The extractor hood is one of the places where more dirt and grease accumulates in the kitchen. It is inevitable but today, we teach you how to clean it step by step so that it is impeccable.
The kitchen is a place that gets dirty quite easily and is usually cleaned daily. In addition, from time to time it is usually done in depth to clean the tiles well, clean and tidy the inside of the freezer… but do you remember cleaning the extractor hood?
It is a strategic place for the accumulation of dirt and grease. Do not miss it and follow these simple steps to clean it!
How to clean an extractor hood?
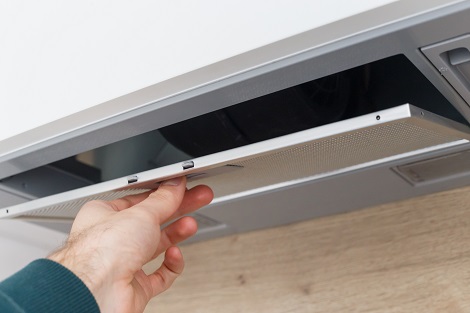
Step 1: remove and clean the filters
First, you must remove the filters from the hood to be able to clean them in depth and access the interior to eliminate the remains of grease that may have accumulated over time.
They are shaped like a metal mesh and are usually held by a tab and are quite easy to remove. Once removed, immerse them in a bowl with hot water, soap and a degreasing product for at least an hour to soften the dirt that has accumulated in the grilles.
Otherwise, if you prefer to use homemade products you can add lemon juice or white vinegar that are also very effective.
When time has elapsed, rub vigorously with a cloth or scourer until all the grease is removed and then rinse them thoroughly with plenty of water.
2: Clean the inside of the hood
While the filters are soaking, it is time to clean the inside of the extractor hood. To do this, disconnect the power supply before starting and use a cloth soaked in warm water, soap and degreaser.
Rub the entire surface carefully to avoid doing so on the engine and then, with a clean cloth, rinse and remove the soap.
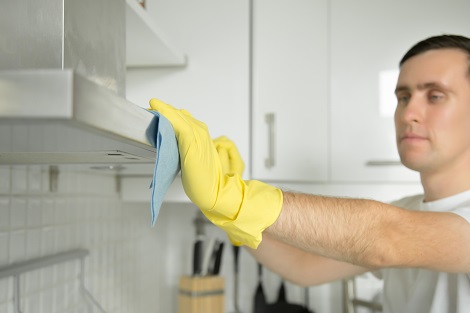
3: Clean the outside of the extractor
It is time to clean the outside of the extractor hood. The process is the same as for the interior area but we recommend that if you are not sure of the right products for the device, use only soap and water to prevent the material from being affected or damaged.
4: Dry everything well and place the filters
To finish, make sure you dry all the parts well, it is important to prevent fungi from forming or a musty smell. In addition, it is best to do it with paper towels, especially outside to remove watermarks.
Once all the parts of the extractor hood have been cleaned and dried, it is time to place the filters, just reassemble them and make sure that the flange has fitted well. Ready, like new!
So far, the step by step to deep clean an extractor hood and remove until the last pinch of grease. It is very important to maintain hygiene in the place where we cook and handle food.
Therefore, if you do not have enough time to carry out a thorough cleaning, remember that you can count on the help of our cleaning service. Until next week!